Puck Light Sconce - How-to
Looking to add sconces to your home but don’t want the hassle of having them hardwired or don’t have outlets available in the location you need? Fear not! There is an easy and inexpensive way to accomplish the look and increased lighting of sconces without calling an electrician.

To complete this project you will need:
a sconce (I got this set of 2)
a puck light (I bought this pack of 2)
super glue (hot glue should work too)
drill/driver
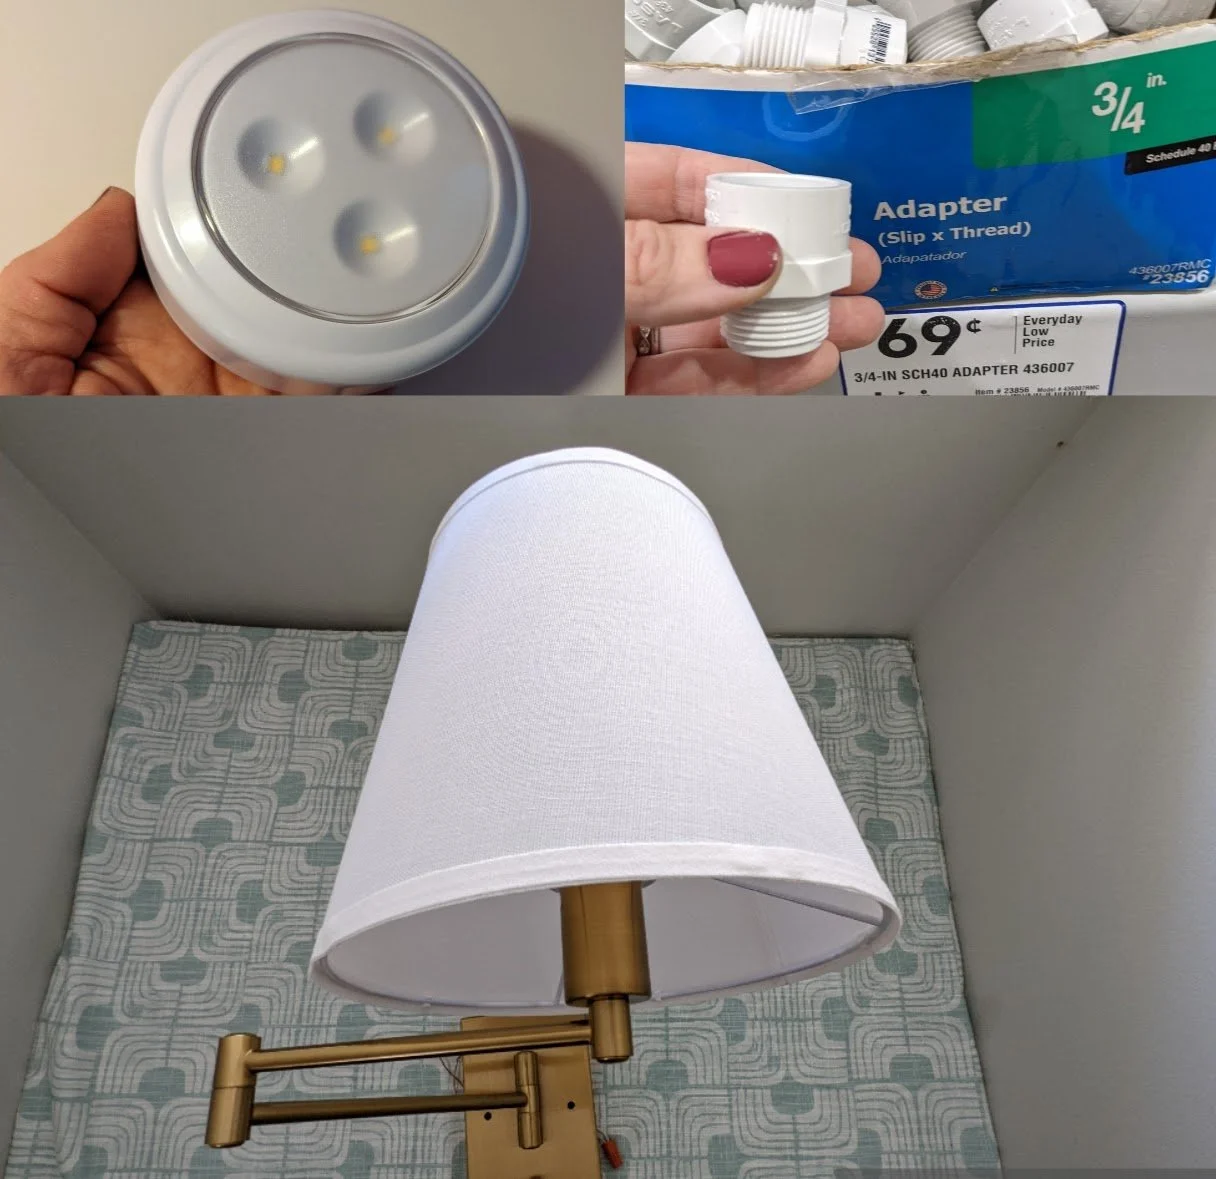
Step 1: Super glue the PVC fitting to the back of the puck light. This will allow you to screw the light into the fixture and allow you to replace the batteries in the puck light as needed.
Pro Tip - always make sure the puck light works before gluing. It’s a lot easier to return a light that doesn’t have something super glued to it if it doesn’t work.

Step 2: Remove cord from sconce/cut wires. I like to play it safe and simply remove the cord but cutting the wires/cord is an option as well. By simply removing the cord you have the option of moving the light to another location later if you want. Tuck the remaining wires (if you left any) into the back of the fixture.

Step 3: Mount the sconce to the wall. Be sure to find a stud or use drywall anchors. Drill a pilot hole to make the process easier.

Step 4: Insert puck light. Screw the puck light/PVC fitting combination into the sconce like you would a regular light bulb.

Step 5: ENJOY!

That’s it! It is seriously that easy! It took me less than an hour to hang 2 sconces and less than $165! FOR 2 LIGHT FIXTURES! INSTALLED! That is hard to beat! Plus it made these matching reading nooks so much more functional!
Have you tried the puck light hack? Where would you like to hang sconces now that you know you don’t need electrical work to complete it? Let us know in the comments!
Want to watch the video for more information? Click here to watch the video on YouTube!
*may contain affiliate links